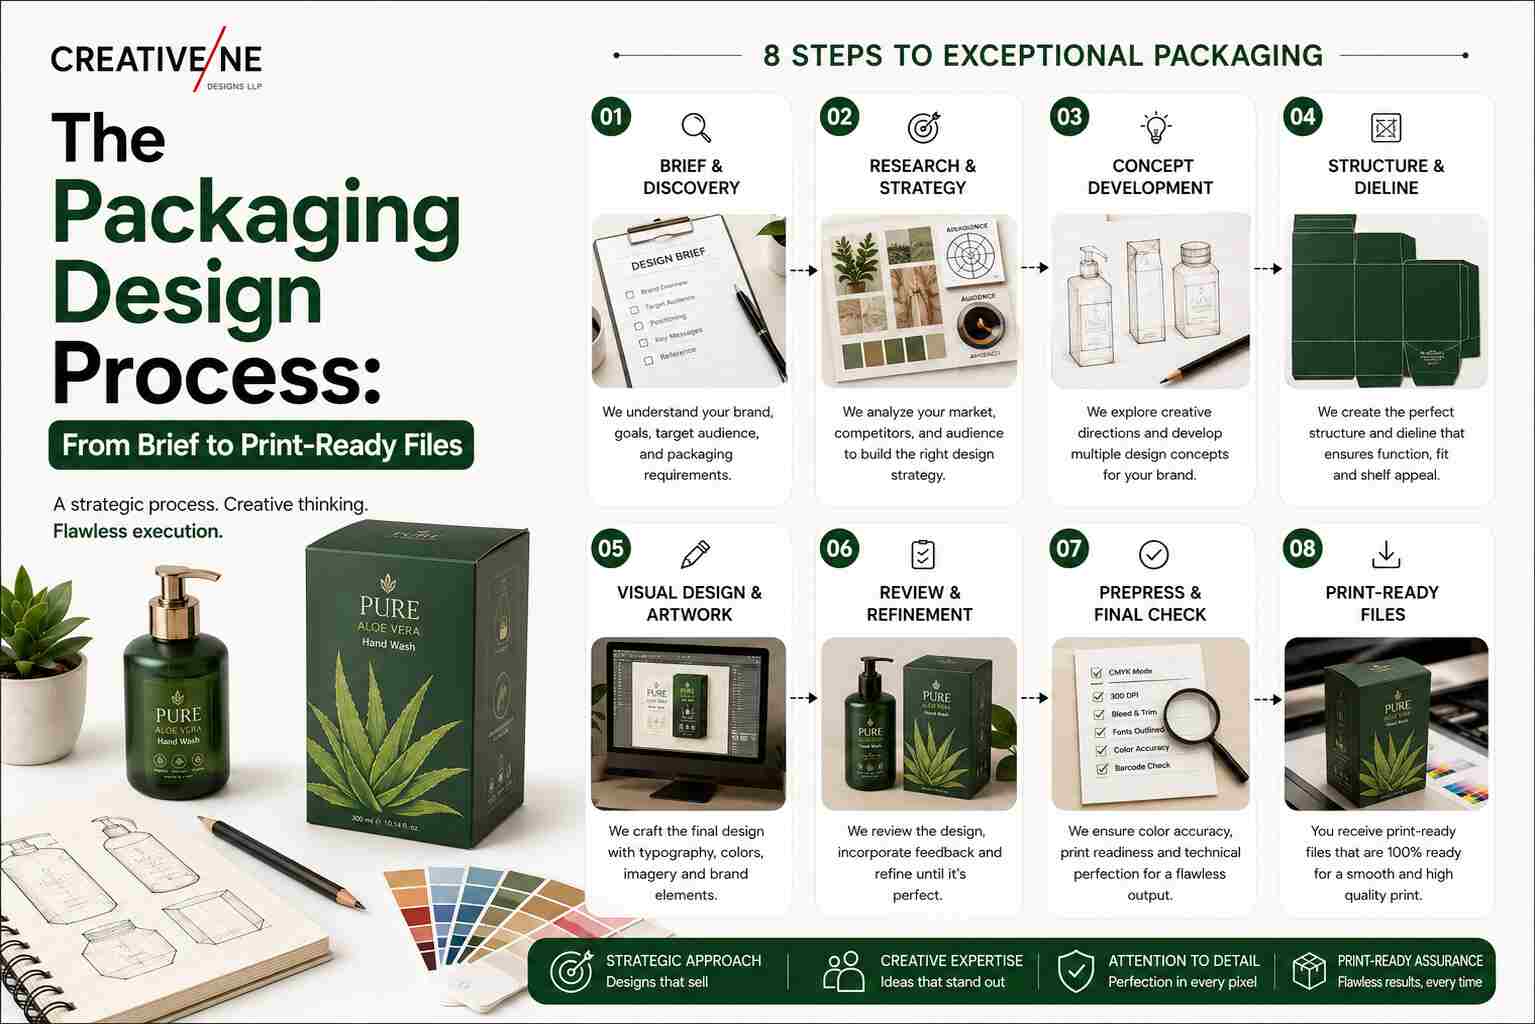
The packaging design process looks nothing like ordinary graphic design, because packaging is the only design work that has to survive contact with the physical world. It gets printed on real material, folded along real creases, stacked in real cartons, and judged in about three seconds on a real shelf. Skipping steps in the packaging design process produces expensive failures at the printing press rather than harmless ones on screen.
Why the Packaging Design Process Is Different From Graphic Design
The packaging design process carries constraints ordinary design never faces. A social media post has one: the screen. A pack has dozens — material behaviour, print method, fold and seal areas, shelf lighting, stacking, regulatory text, barcode readability, and cost per unit at scale.
Get the artwork right and the dieline wrong, and you discover it after ten thousand units are printed. This is the fundamental reason packaging is handled by specialists and priced differently from other design work, as we explained in our packaging design cost guide.
The 7-Step Packaging Design Process
Step 1: Brief, Research and Shelf Audit
The team gathers product details, target customer, price positioning, and distribution channel — a pack for a modern-trade shelf differs from one built for e-commerce shipping. Competitor packs are studied as a set, so your design can be deliberately different rather than accidentally similar.
You receive: an approved brief and a competitive audit. Common mistake: briefing on aesthetics only, with no information about where the product will actually be sold.
Step 2: Structure Selection and Dieline
Before any visual work: what physical format — pouch, carton, jar, bottle, sleeve? — in what material and size, produced by which printing method. The dieline (the flat technical template with fold, cut, and bleed areas) is finalised here, usually with your printer’s input.
You receive: structure recommendation and an approved dieline. Common mistake: designing artwork first and forcing it onto a dieline later, which ruins layouts and delays production.
Step 3: Concept Design
Designers develop distinct visual directions on the correct dieline — hierarchy of brand name, product name, variant, and claims; imagery; colour coding across variants. Usually two or three directions go forward.
You receive: 2–3 concept directions. Common mistake: judging concepts on a laptop instead of at real size.
Step 4: 3D Mockups and Shelf Testing
The chosen concepts are rendered as realistic 3D mockups and placed in a simulated shelf beside competitor packs — the only honest test of whether your design stands out. Many brands also print a physical proof at this stage.
You receive: mockups and a shelf simulation. Common mistake: skipping this and discovering the pack disappears on shelf after printing.
Step 5: Compliance Check
Regulatory content is verified and correctly placed — for food products this typically includes FSSAI licence details, nutritional information, ingredient lists, allergen declarations, net quantity, manufacturing and expiry details, and country of origin, alongside a scannable barcode. Requirements differ by category, and cosmetics and supplements carry their own rules.
You receive: a compliance-checked layout. Common mistake: treating legal text as an afterthought squeezed in at the end, which forces redesign or, worse, a recall.
Step 6: Print-Ready Artwork
Files are prepared to your printer’s exact specification: correct colour mode and Pantone specification, bleed, trapping, resolution, embedded or outlined fonts, and dieline layers marked as non-printing.
You receive: production-ready PDFs plus editable source files. Common mistake: sending RGB files or missing bleed, which halts production and delays your launch.
Step 7: Printer Coordination and Press Check
The designer answers printer queries, reviews digital and physical proofs, and where appropriate attends the press check — because colour on screen and colour on a press are never quite the same, and the moment to catch it is before the run.
You receive: approved proofs and a production-matched result. Common mistake: assuming handover ends the job, then accepting a printed result nobody signed off.
How Long Does the Packaging Design Process Take?
The packaging design process runs to different timelines depending on scope:
- Single label or pouch (existing structure): 1–2 weeks
- Complete packaging for one product: 2–4 weeks
- Product range with a design system (5–10 SKUs): 4–8 weeks
- New structural development: add 1–3 weeks
Compliance-heavy categories such as food, supplements, and cosmetics run longer, and printer scheduling adds real time on top of design.
What to Prepare Before the Packaging Design Process Starts
The packaging design process moves faster when you arrive with these ready:
- Product details: exact name, variants, net quantity, ingredients, shelf life.
- All mandatory legal text and certifications, in final approved wording.
- Your printer’s specification sheet, if a printer is already selected.
- Competitor packs — physical samples are better than photographs.
- Where the product will sell: general trade, modern trade, e-commerce, or export.
Arriving with these ready routinely saves a week and prevents the most common cause of packaging rework: legal text arriving after the layout is finished. For how this shapes decisions in fast-moving categories, see our FMCG packaging design guide.
Frequently Asked Questions
What is a dieline in packaging design?
A dieline is the flat technical template showing cut lines, fold lines, glue areas, and bleed for your pack. All artwork must be designed on it so the printed pack folds and assembles correctly.
What information is legally required on packaging in India?
Requirements vary by product category. Food packaging generally requires FSSAI details, ingredients, nutritional information, allergens, net quantity, manufacturing and expiry information, and manufacturer details. Confirm current requirements for your specific category with a compliance professional before printing.
How many concepts should a packaging design company show?
Two or three fully developed directions on the correct dieline, presented as mockups. Volume matters less than whether each concept is production-viable.
What files does the printer need?
Print-ready PDFs with correct colour specification, bleed, and resolution, dielines on a marked non-printing layer, and editable source files. Ask your printer for their specification sheet at the start, not the end.
Process Is What Keeps Packaging Out of Trouble
The packaging design process exists because good packaging is not just a nice design — it is a design that prints correctly, complies fully, and works at three seconds on a shelf. Each of the seven steps above exists because a brand somewhere skipped it and paid for the reprint.
Planning packaging for a new product or a range? Creativeline is a packaging design company in Gandhinagar working with spice, snack, FMCG, and supplement brands across India. Talk to us about your product.
